Monday, November 12, 2012

Christmas Beer Bottles


This post is dedicated to my Aunt Karen. She emailed me asking what she can do with a bunch of empty beer bottles she had from the brewery she owns. She wanted something crafty and creative to do with the so I put on my thinking cap and this is what I came up with! With Christmas on the mind, and just around the corner, I used the bottles to make Christmas inspired decorations that could be used along a fireplace mantle or anywhere in your home.


Supplies:
3 glass beer bottles
Green Valspar spray paint
Christmas ribbon- thick and thin
Wooden glitter letters
1 purple plastic snowflake ornament (used behind the "o")
Fake glittered branches from Hobby Lobby
Hot glue gun

Directions:
1. Make sure that the bottles are clean of sticky residue left over from the labels. I used Goo Gone to get it off but hot water and soap should also do the trick. 
2. Spray paint the bottles by using long even strokes. Avoid the paint from running down the bottle. I sprayed the bottles in my garage and sat them on cardboard so I didn't have paint everywhere!
3. After letting the bottles dry completely, I wrapped the thick Christmas ribbon around the bottle and then used hot glue to secure it. 
4. For the J and Y bottle, I took the thick ribbon again and cut 2 6-7 in. pieces of ribbon. I took the ends of the ribbon and folded them towards the center and put a dab of hot glue.
5. After folding both pieces of ribbon, I glued one on top of the another in a cross. Then, I took the thinner ribbon and did the same and glued that on top of the thicker ribbon.
6. For the "O," I used a snowflake ornament behind it instead and put some of the thinner ribbon along the edge of the snowflake to add some pizzazz. 
7. Lastly, I hot glued the wooden letters on top of the ribbon bows and put the glittered branches in the bottles.
8. YOU'RE DONE!

Sunday, October 21, 2012

Halloween Wreath

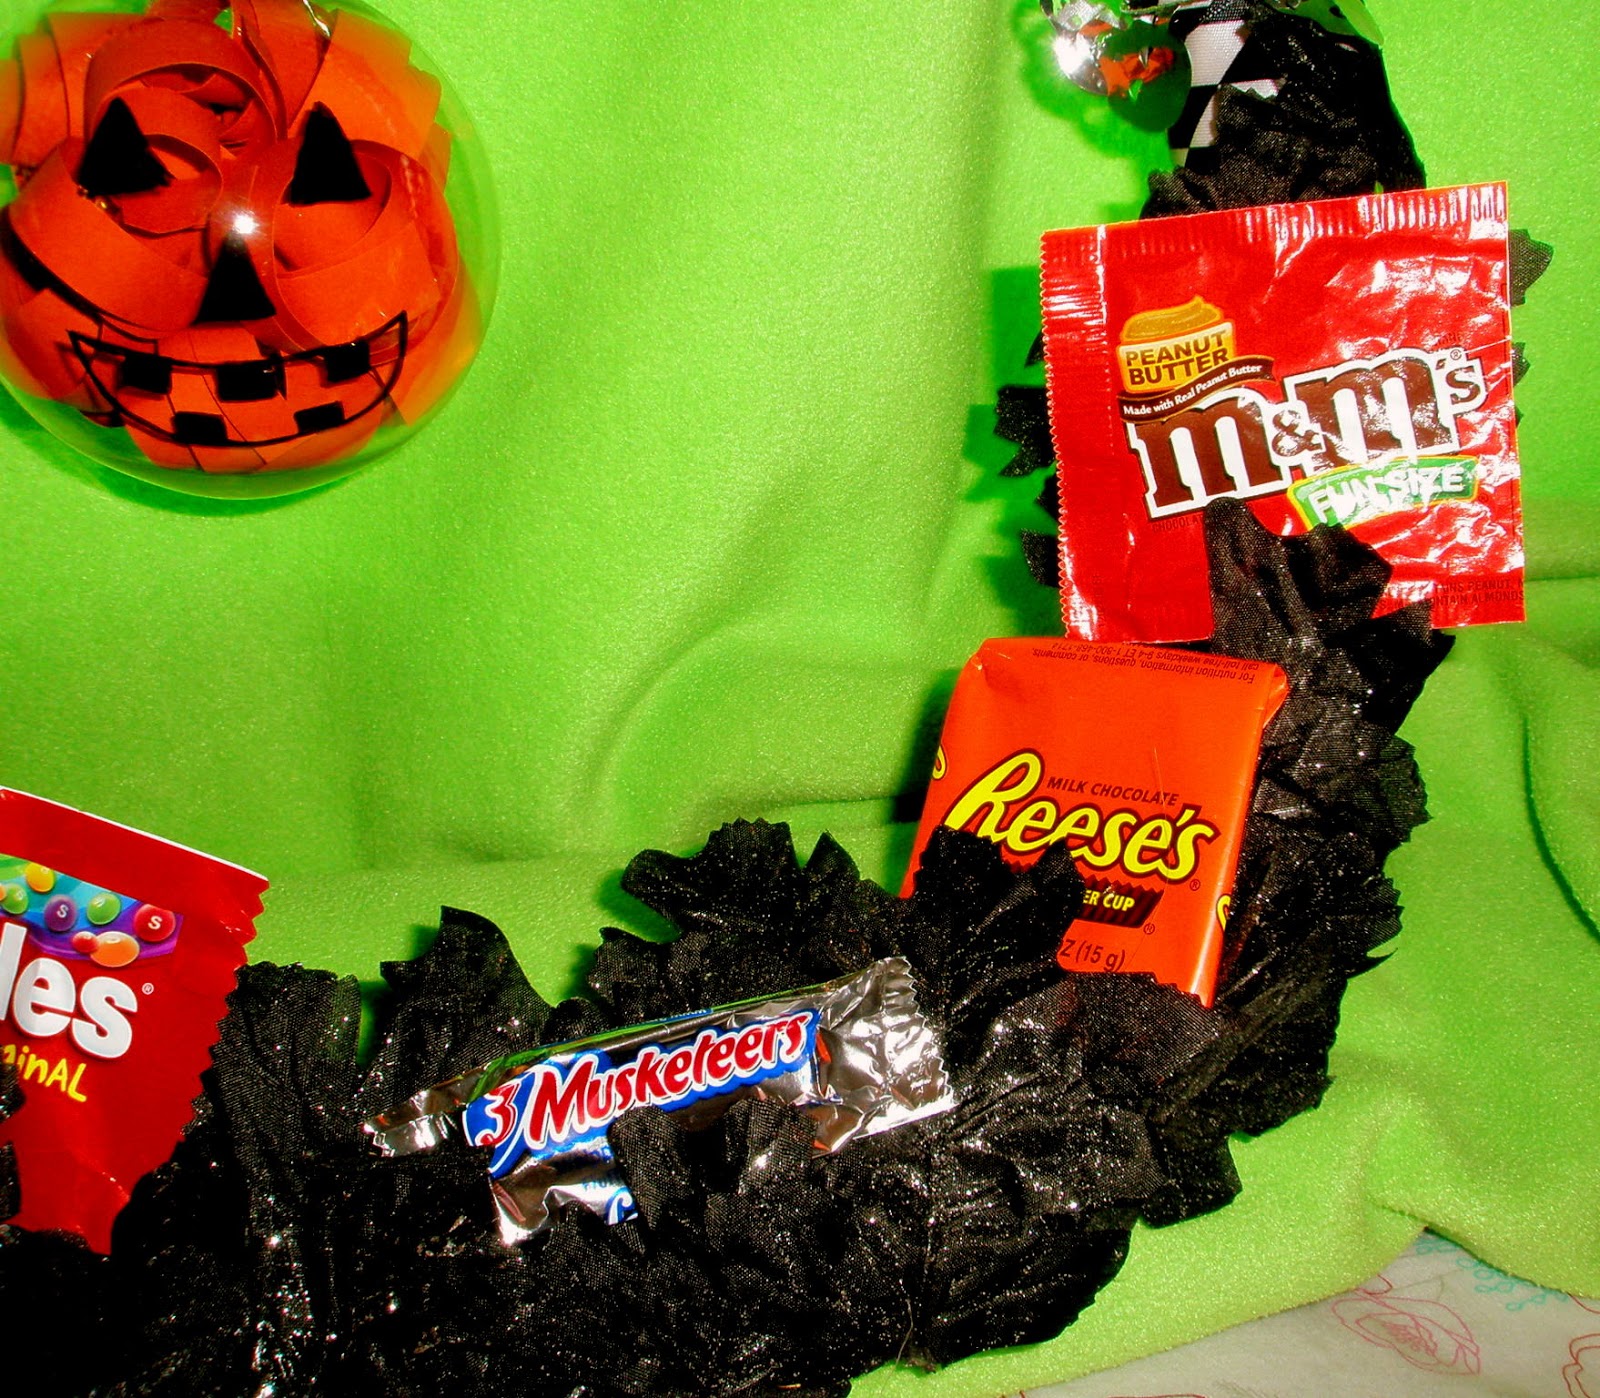
Gosh college gets busy! Between classes, meetings, and homework, I've had zero time to upload any more projects but the time has finally come! Since it's already Halloween time, I decided to make a Halloween inspired wreath from inexpensive supplies found at Michael's and the Dollar Store.


The supplies I used were:
-1 plain wreath
-a bag of plastic Halloween rings
-candy wrappers
-black glitter leaf garland
-silver skull garland
-ribbon
-gemstones
-clear ornament
-orange construction paper
-green pipe cleaner
-Sharpie marker
-hot glue gun


When making wreaths, there's really know set way of going about it. The key is finding good supplies that work well together. I also like having a focal point with my wreaths. In the Halloween wreath, I made the focal point the pumpkin in the middle. Other types of focal points may be wooden initial letters, bigger flowers, or a bow. It all depends on the theme of your wreath!


Friday, September 21, 2012

DIY Decorative Vases

I am an avid drinker of Snapple, specially Diet Peach flavor. I always felt bad buying the 6-pack case of Snapple bottles and once I got drinking them, just throwing away (or recycling!) perfectly good glass bottles. So I started saving (some might also say hoarding) them in my dorm room until I came up with the perfect use.
I kept seeing decorative vases becoming more and more popular to add a special touch to a room. However, there was one small problem. A lot of the vases I saw in magazines, online, etc...had more of a "older" look to them, although very beautiful, it would not go with a college girl's dorm room necessarily. I needed a bright color scheme, something fun and exciting! That's how I came about making my own vases. The best part is that you can personalize them for any room color scheme, holiday, season, whatever you want!


Supplies Needed:

-Yarn in the color of your choice (I suggest getting multiple colors)
-Hot glue gun
-Glass bottles (Snapple, wine bottles, etc.)
-Charms, beads, or other knick knacks that you want on your vases

Directions:
1. To start, put a small dot of hot glue at the top of the bottle right below where the lid screws on. Trying to wrap the yarn at the top where the spiral-y part can be very difficult and look uneven because the yarn doesn't lay flat. 

2. After the initial dot of hot glue at the beginning you do not need to keep gluing around the entire bottle. As you keep wrapping the yarn around the bottle, glue will most likely be needed when the bottle gets to the bend where it stops curving. Other than that, you will not need glue to the very end.

3. Keep wrapping the yarn around the bottle. Try to get it as close to the very bottom as possible. Add a final dot of glue at the end and you're set!

4. Now, to spice the vases up a little bit and add the charms. Really, there is an endless amount of ways to add charms, beads, or other embellishments. I added them by threading the yarn through my circles and straws and wrapping it around the bottle. Then I simply tied a knot in the back to keep it in place and voila!


Saturday, September 8, 2012

Paper Cup Lights

As you might notice, I have a common theme with my posts. I'm trying to spice up my dorm and my projects have been centered around it. This is another one. However, you can use these ideas for other rooms besides a dorm. 
The dorm that I currently live in is the oldest one on campus to the extent that it does not have overhead lighting (or central air conditioning for that matter :P). Therefore, I've had to make do with a floor lamp to light my entire space, but that wasn't cutting it. I wanted another form of lighting and I always thought that white Christmas lights in a room was cute and feminine but I wanted to take it up a notch. That's when I found this project on Pinterest from http://totallyloveit.com/diy-decorative-paper-cups-lights/


ADORABLE, right?!

So I decided to add the paper cups to a string of white Christmas lights. The directions were quite simple and easy. The worst part was probably wrapping the scrapbook paper to fit around the cups. 


Supplies needed:
Christmas lights
Paper cups (I would suggest the mini cups)
Scrapbook paper (pretty good amount, depending on how many lights are on your string)
Mod Podge
Scissors

Directions: 
1. Start by taking one paper cup and cutting it down one side vertically and removing the bottom circle. This way you can make a template on the scrapbook paper that will fit around the paper cup exactly.
2. Then start tracing onto your paper! 
3. Cut out your stencils and start applying Mod Podge to the paper cups and wrapping the scrapbook paper around them.
4. Finally, once the Mod Podge has dried, take your scissors and make an X on the bottom of the cup. 
5. All that's left is to slip the light bulbs through the X and they stay on perfectly! 
Voila! You have paper cup lights that can be tailored to any room color/theme :)


Thursday, September 6, 2012

Desk Makeover

Over the summer, my dad's business was getting rid of a lot of their old office furniture. It was the perfect time to go rummaging through it all to see what I could get my hands on and turn into another project! I had seen a lot of furniture makeovers all over the web and wanted to do something like that. I've had the same two dressers in my room for as long as I can remember. I mean, they're pretty ancient. In fact, I don't think I've EVER had any other furniture. It was time for a change.
The taller dresser of the two was just full of nick nacks, junk, and some old clothes that I hadn't worn in years. Basically, it was a waste of space. So I cleaned out my dresser and passed it on to my little sister who has enough clothes for a new outfit each day. 
While I was rummaging through the office furniture, I came across an old, brown desk. It was pretty beat up and was made of that "fake wood." It wasn't the nicest looking piece. But that was all about to change!
Unfortunately, I do not have a before picture (beating myself up for it as we speak!) but hopefully you can see from the after picture that it looked a lot better than it did before. 
Here's how I did it:
1. I started off by painting the desk black. It helped to disguise the scratches and some of the rough patches and made it look sleeker than the brown.
2. Next, I picked out scrapbook paper that I really liked and started cutting it to fit against the cabinets and backdrop of the desk.
3. Then you just start applying the mod podge on the desk and placing the scrapbook paper on top! I would recommend putting the top coat of mod podge over the scrapbook paper as you go. This way the paper won't be going anywhere and you have it nice and sealed in :)
4. Wait for it to dry! (Which is fairly quickly.)
5. And there ya have it, a brand new, stylish desk!


Thursday, August 30, 2012

Paint Chip Initial & Flowers

Living in a dorm can be pretty depressing. I mean, there's just not much to it. Blank, white walls, some windows, ugly brown closets and desks...color is definitely lacking! I wanted to bring some brightness and life to the place that I would be living in for the next 9 months so I started thinking of ways I could do that. Paint was not an option, unless, I wanted to pay a hefty fine at the end of the semester. Buying a few pieces of artwork would be costly. I could make my own masterpieces but that would require spending dollars on paints, brushes, and other supplies for basically a one-time use. Not worth it for a girl on a tight budget.

While on Pinterest, I came across an entire wall covered with paint chips.


First thought: WHOA! That is brilliant.
Second thought: I DO NOT have that much time on my hands.

Therefore, I came up with my own paint chip art that takes up a lot less time than applying hundreds of them to an entire wall, but still bringing color to a dorm room for free!


To Make Paint Chip Initial:
1. Start by deciding what color scheme you want to go with- warm colors, cool colors, neutrals, brights, or just a mix n' match or swatches! 
Take the colors you've decided to use for the initial and cut thin horizontal strips across each color (about half an inch thick). Cut A LOT of them! Trust me, you'll go through them quick after layering them on.

2. Once you have a nice pile of strips to work with, begin by applying glue (preferably glue stick, super glue, or hot glue) to one of the long edges of the strip on the colored side and place another strip just barely over it. This will make the overlapping look. 
Note: After attaching around 15 strips together, it may become a little flimsy. To make it hold together until it's finished, I flipped it over to the backside and placed a piece of masking tape vertically on the back to keep the pieces in tact while the glue dries. The tape can remain on there, no one will see it!

3. For the letter "M," I made two identical longer pieces for the "sides" of the M and then made two smaller pieces for the inside part or the "v." I simply attached all of the pieces together to make the shape of the "M" by using the masking tape. 


4. And voila! You are finished! Since I live in a dorm, I just hung it on the wall with putty so the paint wouldn't chip causing me to have fines. To make it more durable, you could also cut out your initial in cardboard and attach the paint chip initial to the cardboard. This would simply give it more support. 

To Make Paint Chip Flowers:
1. Start by making a template for your petals. You will need larger, wider leaves for the outer petals of the flower and thinner or "skinnier" petals for the inside petals. Having a template will allow you to trace your petals quickly and efficiently. 

2. Just as you applied a thin layer of glue to the side of the strips for the initial, you will apply a thin layer of glue to one colored side of the petal and overlap the next petal.

3. Repeat the above process until your flower is complete! You can mix and match colors using the color scheme you prefer.

4. Lastly, cut a circle out of a paint chip either by using a circle cutter or by hand and glue to the center of your flower!

5. THAT'S IT! Who would've thought decorative wall flowers could be so simple? :)
BONUS: To spice up your flowers even more, you could add glitter, rhinestones and/or other embellishments depending on your taste and the look you're going for. 


Monday, August 27, 2012

I'm OFFICIALLY a blogger!

Hello everyone!
After much apprehension and hesitation, I have finally made my first attempt at blogging. It took me awhile to even realize that I could post all of my awesome projects online to share with the world until I became an avid, crazily obsessed Pinterest user and came across TONS of blogs there. However, that still wasn't enough to convince me that I could put together my OWN blog until my boyfriend's cousin told me to go for it! 
So I did. 
And now, I am so anxious to get started posting my different ideas and projects I create and hope that you all enjoy them as much as I do...and maybe make your own! 
I would just like to welcome you to my blog and I hope that I can get your creative juices flowing with the projects to come!